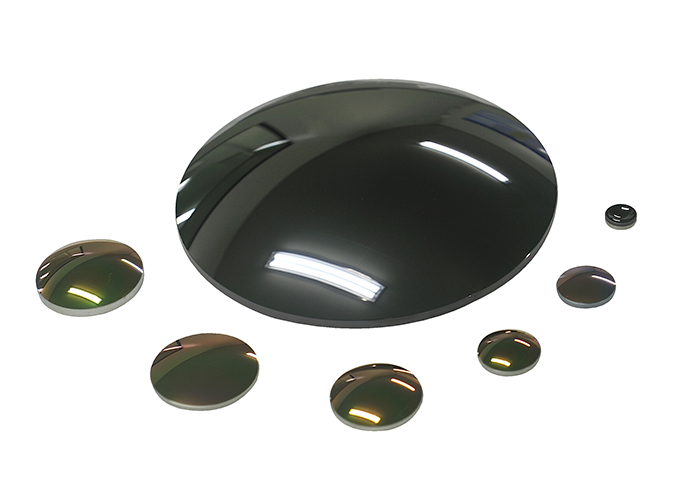
With the rapid development of thermal imaging technology, thermal imaging products have been towards larger array size and smaller pixel size, which makes higher requirement on the processing technology and inspection accuracy of optical components. As a key technology to ensure the optical processing accuracy, surface shape inspection technology has become one of the key competitiveness of companies.

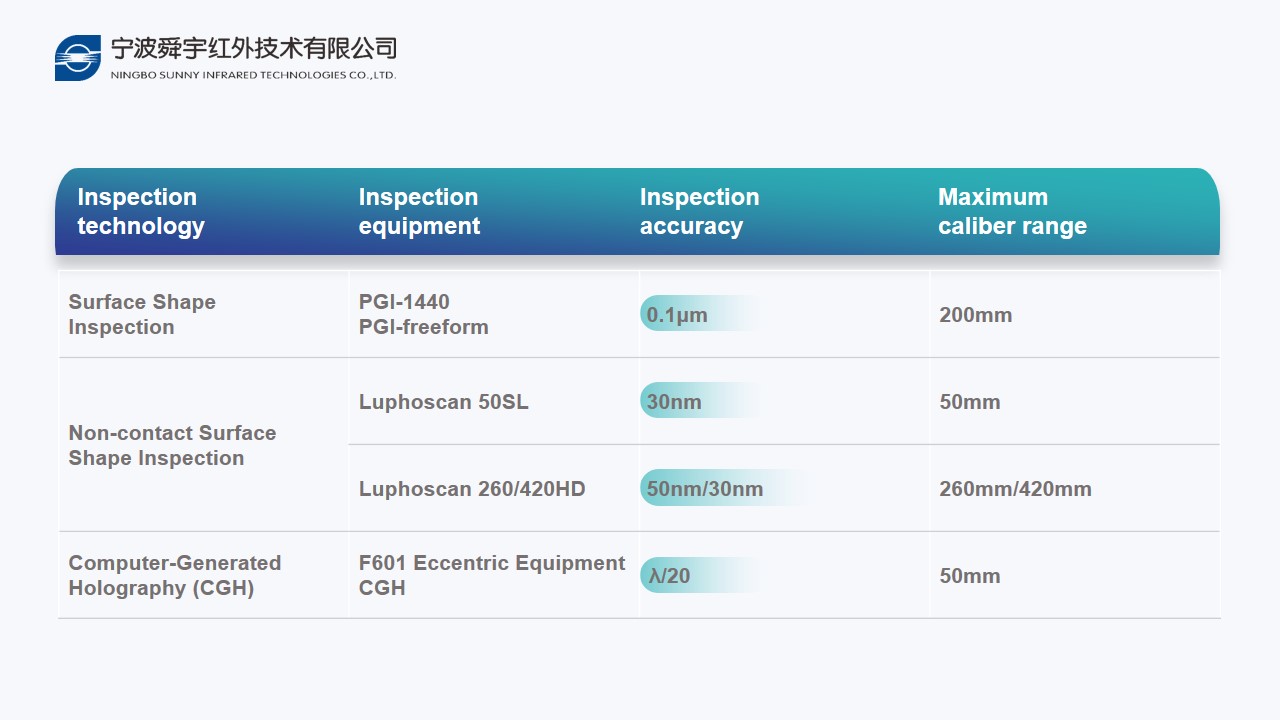
Sunny Infrared Optics has decades of experience in optical component processing and possesses a complete range of surface shape inspection equipment including PGI Optical series and UA3P, which inspect the lens surface using contact measurement ; Laser interferometer, three-coordinate white light scanning interferometer, laser trapping scanner, white light interferometer, Computer-generated holography, Luphoscan etc., which inspect the lens surface with non-contact measurement. The full range of inspection equipment is equipped with independently developed surface analysis software, which can cover the inspection of various complex surface shapes such as diffractive surfaces and freeform surfaces.
The principle of contact surface inspection is to measure the surface contour coordinates of the tested component through a scanning box and a stylus, and to transmit the coordinate data measured by a phase grating interference sensor to a PC through software that performs mathematical operations on the collected raw coordinate data. Main representative equipment includes PGI Optical series from Taylor(UK), LD series from Mahr(Germany), UA3P series from Panasonic(Japan), and CS series from Mitutoyo(Japan). The advantage of this testing method is that it can measure coated lenses with high measurement efficiency and easy operation. The disadvantage is that it leaves stylus marks during testing and measuring.
The principle of non-contact surface shape inspection is to use scanning technology to perform non-contact measurement of the part, and to restore the macroscopic and microcosmic information of the 3D surface contour using software tools for various functional parameter data processing, enabling nanometer measurement and analysis. Main representative equipment includes Luphoscan series from Taylor(UK), MFU series from Mahr, and NMF series from Phoebus. The advantage of this testing method is that it can perform complete error evaluation on lenses without damaging their surface contour. The disadvantage is that it has limitations when measuring coated lenses, and has many moving parts causing high requirements for the environment and operator capabilities.
Traditional optical inspection methods have certain drawbacks and it is difficult to cover all inspection surface shapes, especially for various complex optical components. The emergence of computer-generated holography (CGH) technology has in a sense make up for the weak links of traditional inspection methods. CGH has extremely high inspection accuracy and stable zero-offset compensation accuracy assurance, and can achieve real-time high-precision inspection of various curved surfaces.
With the continuous improvement of the accuracy requirements for optical element surface shapes in thermal imaging optical systems, there is higher requirements on lens surface inspection. Sunny Infrared Optics will continue to explore the field of surface inspection to provide solutions for accurate, rapid and comprehensive lens surface inspection.


+86 574 6253 0985
No. 360, 362 Fengyue Road, Yangming Street, Yuyao, Zhejiang Province, China
Copyright © Ningbo Sunny Infrared Technologies Co., Ltd. (Subsidiary of Sunny Group) | Sitemap | Technical Support:
